

No products in the cart.


Bangle Making
At Durston Tools, customer satisfaction, product quality, usability and function are our top priorities. We are always on the look out for new innovations that can streamline the jewellery making process without compromising on quality. Durston Tools’ Bangle Forming Die Set, the brainchild of goldsmith Mike Taylor, came into being in a jewellery workshop in sunny North Devon. When we saw it, we knew that our customers would love it; so, we made it! The innovative tool set simplifies the proves of making bangles; follow our step by step guide for making a torque cuff bangle, or check out our video, where you can see Mike Taylor himself make a beautiful bangle in just three minutes.
What’s Included?
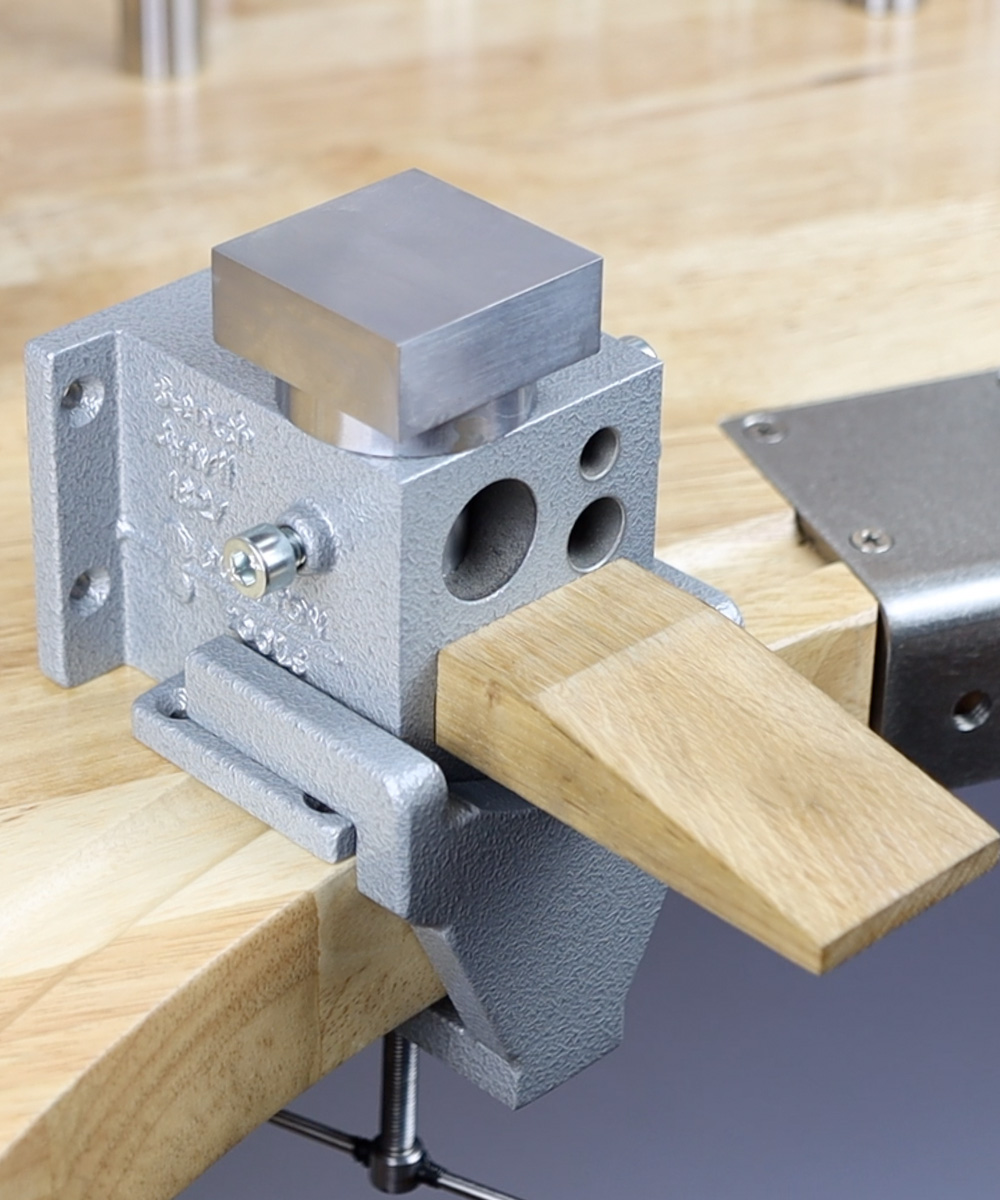
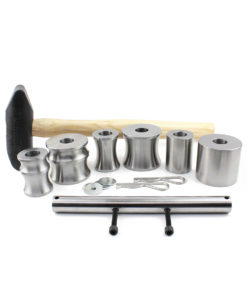
Your Bangle Forming Die set will include six dies, a curved nylon mallet designed to fit the contours of the dies, retaining clips, and a metal carrier rod. The set doesn’t include a vice, which you will need to buy separately.
Before you start, unpack and degrease the set. Pop the Alan screws and washers into the carrier rod and place the bolts face down in the vice. The washers are designed to protect the carrier rod and will sit on the upper edge between the vice jaw and carrier rod. Twist the bolts on the carrier rod, then tighten the handle of the vice to secure the rod in place. You are now ready to make a bangle.
Let’s Take Its Step-by-Step
- Place the larger dye on the carrier rod. Use the retaining clip to hold the die in place and stop it from slipping off the rod.
- Using your hands, gently bend the cuff to fit around the die.
- Once you have bent the bangle to the rough shape, use the mallet to achieve a tighter fit. Using firm taps, push the metal in around the dye as you gently turn the bangle from right to left.
- Once the metal is laid down, flip the bangle and do the same on the other side, working right to left, twisting the die as you hammer.
OK, Whats Next?
- Once the metal lays completely into the die, you will see that you have a circular bangle. To create the torque shape, you need to switch your large die to the smaller one to move the ends in.
- Start hammering from around from the end of the bangle, hammering outwards towards the end. Repeat on the other end of the bangle.
- You now have your curved torque shape. Use your hands for minor adjustments; your cuff bangle is complete!
Why not check out our bracelet mandrels as well?
Do you have an idea that you think could help other jewellers? Watch this space!

£178.00 exc. VAT
SKU: 1181

£38.00 exc. VAT
SKU: 1183